Showing posts with label DIY. Show all posts

Monday, January 19, 2015

Almond Butter Dream Bars

Ok, I'm being a little eccentric with the title of these bars - but they are seriously SO DELICIOUS. They are candy bar delicious, my friends. I have tried to make homemade granola bars before and failed in flavor and in form. I wanted a granola bar or a cookie or SOMETHING earlier today, but I wasn't willing to let myself succumb to the kids' cookies or leftover Christmas candy.

So, we went for it. I had to make some more almond butter, but it was totally worth it. To date, these are the best homemade granola bars I've made and tried. As I posted on my Instagram and FB page, these are not 100% clean. If I would have had Enjoy Life vegan chocolate chips on-hand, I would have used those. Alas, I had Tollhouse milk chocolate chips leftover from holiday baking. I added less than 2TB in the whole recipe; so, really, it's a pretty minor offense. Do what you wish; I don't think a few Tollhouse chips vs. 100% dark chocolate - in this recipe - will make or break your day.

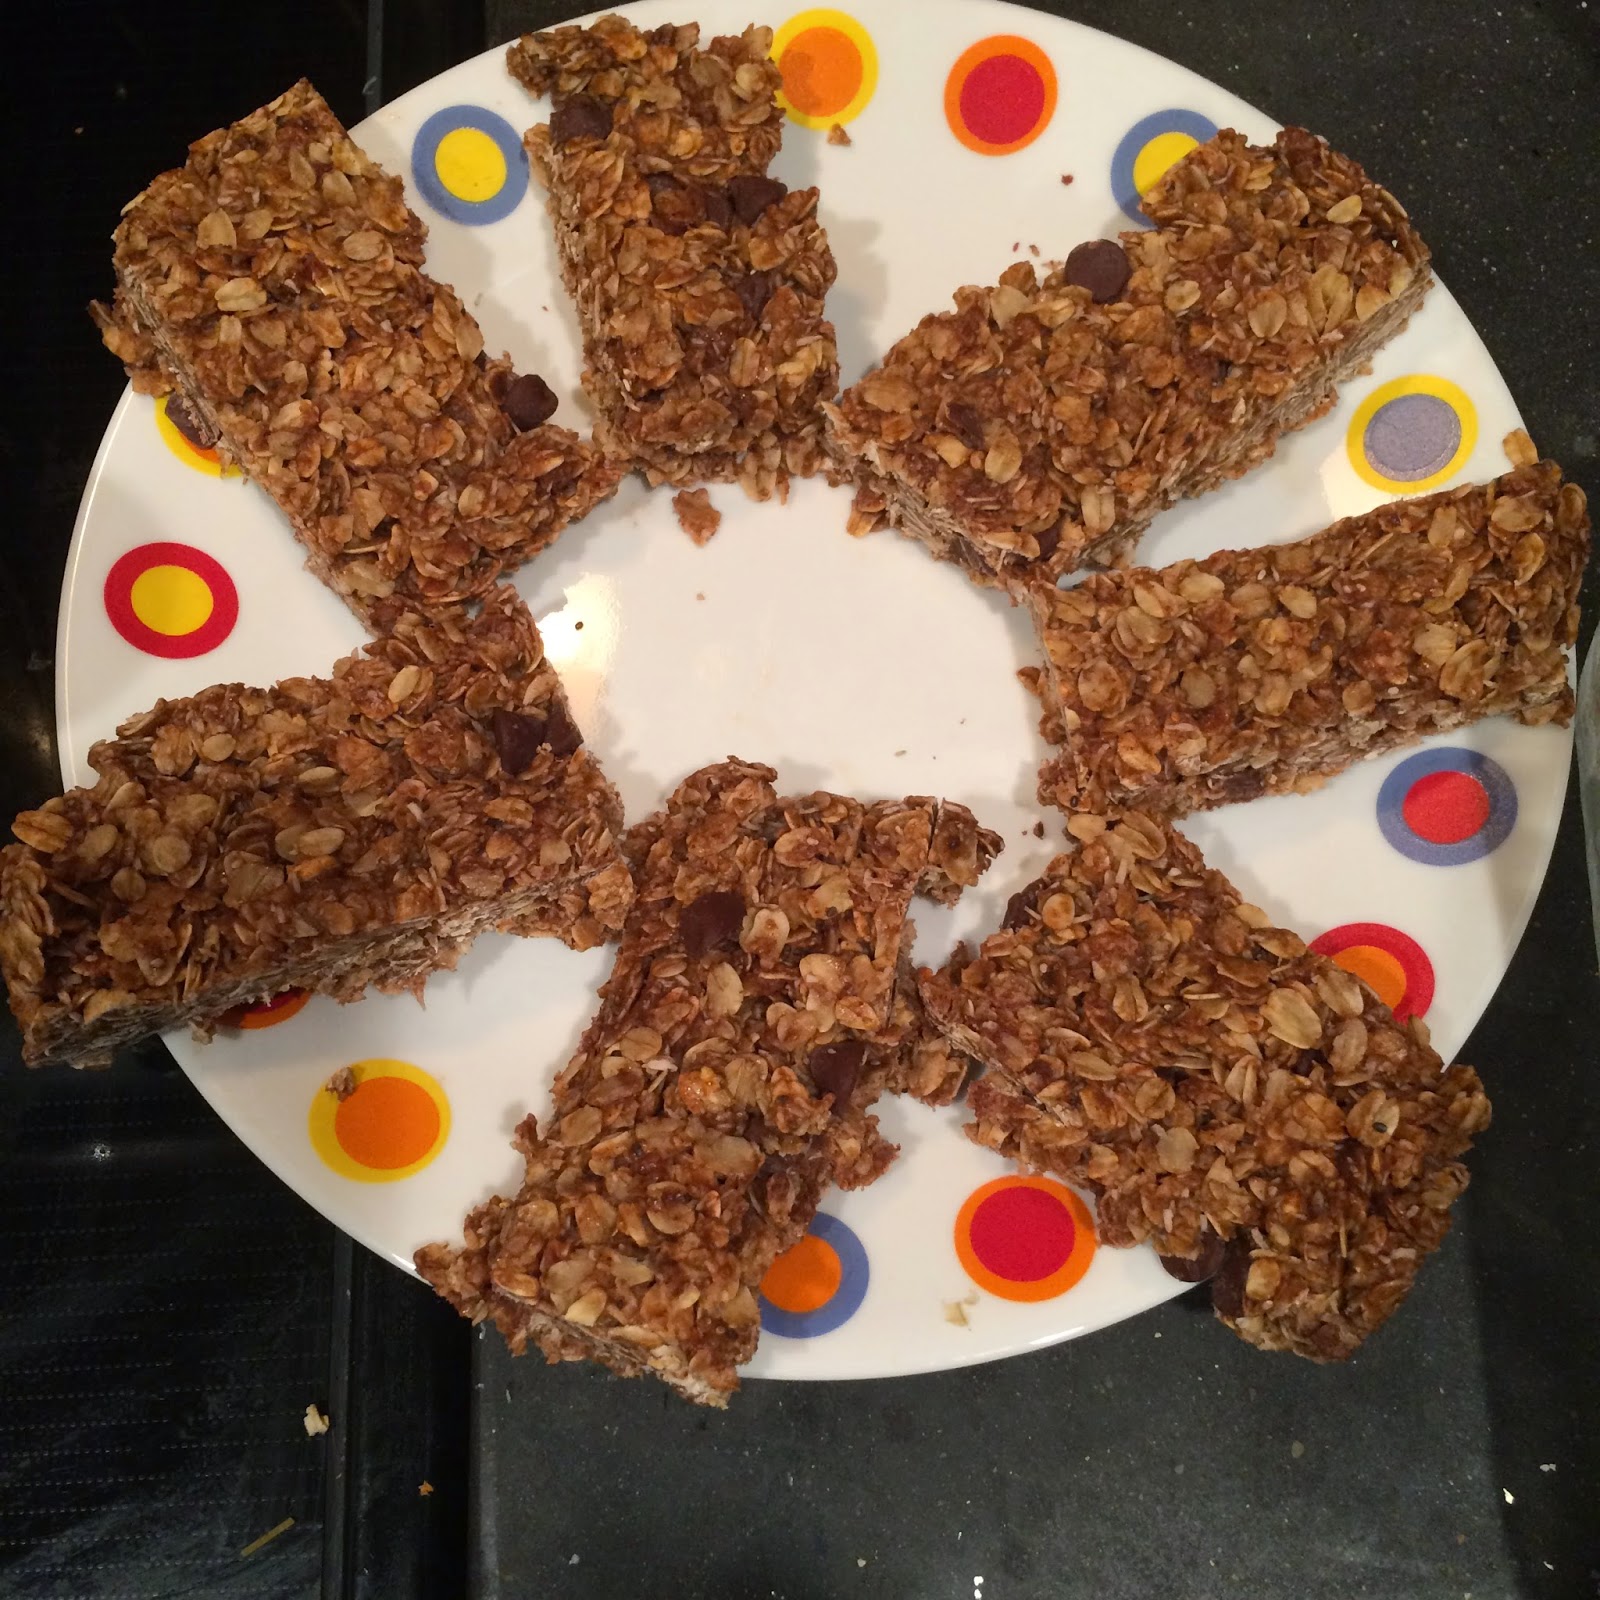
This recipe makes about eight or so bars. Double it up if you want more or make as is if you're skeptical.

Here's what you need: 
  • 2 cups raw old-fashioned rolled oats
  • 1 TB unrefined coconut oil, melted
  • 1 TB chia seeds
  • 3/4 cup almond butter - I used my own recipe, but any natural nut butter is fine.
  • 1 tsp pure vanilla or vanilla extract
  • Sea salt, just a conservative dusting
  • 2 TB of unsweetened shredded coconut
  • About 1TB of chocolate chips.
  • Enough honey to coat the mixture together as you combine - giving it some stickiness.
Here's what you do: (ready? this is so challenging...)
  • In a mixing bowl, combine all ingredients listed above.  
  • Press into an 8x8 baking dish, lined with parchment.
  • Move dish to the freezer until solid. 
  • Remove when solid; cut into bars or bite size pieces (better for kids) and enjoy!
  • You may want to return the bars to the fridge for storage as they do get a little melty at higher room temps. 
Tips: 
  • WAIT until they really solidify to serve. If you try to eat these soon after you make them, you will need a spoon. Don't say I didn't warn you.
  • Don't over-do it on the honey. You really just need it and the peanut butter to bind the rest of the ingredients together. 
That's it! SO easy, so delicious and more or less guilt-free! I will definitely be making these again. They are an awesome alternative to store-bought bars and take very little time or effort to put together. Hope you enjoy them!!!


Tuesday, February 4, 2014

Homemade Oatmeal Creme Pies

Ok, I know what you guys are thinking. Some days she's a clean eater; some days she's a vegetarian; some days she's a smoothie nut; AND, some days, she does things like this....

HOMEMADE OATMEAL CREME PIES. 

Listen. I just like culinary experiments. AND...I saw an Oatmeal Creme Pie on Pinterest. Then, I wanted said Oatmeal Creme Pie. If we're honest, we'll admit that the only thing making those plastic-wrapped cookie-esque things delicious is nostalgia. They really aren't that delicious. Who didn't get an Oatmeal Creme Pie in their school lunch once or twice, right?!

I told my husband about my sudden hankering for oatmeal creme pies and he reminded me of Grandma Carey's delicious oatmeal cookies. No sooner was I feverishly messaging sisters and calling up old blog posts for the recipe. It really is amazing. I know store-bought Oatmeal Creme Pies are probably filled with a combination of garbage and HFCS. So, after consulting with the hubs, we decided the only appropriate filling would be homemade cream cheese frosting. I know, right!?

So, the hubs started dinner while I started the frosting and cookies. Everything was finished about the same time and we enjoyed warm, delicious oatmeal cookies joined together with a layer of decadent homemade cream cheese frosting, right after supper.

Here's the cream cheese frosting recipe (it makes more than you need):

Here's what you need:

  • 1 block softened cream cheese
  • 3 cups confectioners sugar
  • 1 tsp vanilla
Here's what you do: 
  • Add all to mixing bowl and blend until thoroughly combined. (Easy peasy, right?)

Grandma Carey's Oatmeal Cookies

Here's what you need: 

1/2 cups brown sugar
1/2 cups white granulated sugar
1/2 cups shortening
1 egg
1 teaspoons vanilla
1 tablespoons milk, cow's
1 cups all-purpose flour
1/2 teaspoons baking soda
1/2 teaspoons baking powder
1/2 teaspoons salt
1 cups oatmeal

Here's what you do:

  • Heat oven to 350 degrees. 

  • Beat brown sugar and granulated sugar, shortening (can use coconut oil, canola oil or butter), egg, vanilla and milk until smooth.
 
  • Sift together flour, baking soda, baking powder and salt. 
  • Add all at once to egg mixture. Beat until smooth.
Add oats and mix well. 
  • Add 1/2 cup (optional): butterscotch chips, nuts, chocolate chips, raisins, Craisins, or other mix-in to oatmeal mixture. 

  • Drop from teaspoon onto cookie sheet, 2 inches apart. Bake 12 minutes or until light brown. Remove from oven and allow to cool on cookie sheet for 2 minutes before removing.

  • Yield: 3 dozen cookies
Notes: 
  • I used a butter-flavored Crisco stick for my shortening. 
  • I used a medium sized cookie scoop and got about two-dozen instead of three. 
  • I want to make these again, tomorrow. :) 


Saturday, January 4, 2014

Kitchen Remodel

A couple posts ago, I told you all about our kitchen overhaul. With plenty of help from friends and family, we had the whole thing ripped out and put back together in about three weeks! We try to do everything as frugally as possible while still doing quality updates, at the best prices (or barters) possible. :) I wanted to show you some before and afters in case you are looking for ideas for your own kitchen.

Initially, we just wanted to replace our laminate flooring. We installed hand-scraped hardwood flooring throughout the rest of the first floor (minus the bathroom) about two years ago, and the transition between our family room and kitchen just hasn't been right since.

Of course, flooring leads to cabinets, cabinets lead to counters, counters lead to walls, and so on. Before you know it, we were committing to a total re-do.

This is the finished product. Here's what we did...


  • Flooring - We replaced our old well-worn laminate flooring with 16x16 porcelain tile from Home Depot laid in a diamond pattern. A friend of ours laid it for us. He does awesome work and is currently helping us renovate the upstairs bathroom. I think this really opens up the room, don't you?
  • Cabinets - Our builder-grade oak cabinets weren't broken or unusable, so we just updated them with paint and hardware. We used Rustoleum Cabinet Transformations to get the paint work finished. It's a simple three to four step process (four if you use the decorative glaze, which we didn't). I opted for the classic white painted look. It was a lot of agony to decide what color, believe me! I think it was the right decision. You'll also notice that we removed our island. (I know! Who would take out extra storage space?) The fact of it is, we really just had it filled with junk that was easily re-homed elsewhere (like the pantry and in other re-organized cabinets). We were constantly stepping on each others toes to avoid the thing. Our kitchen really isn't big enough to be further cramped with the island, breakfast bar that we never used - not once - plus four kids.
  • Counters - This may be my favorite part. We replaced our original counters with concrete counter tops. After looking at a few sample colors, we went with black (charcoal, maybe) counters infused with brilliant flecks of stainless steel. WE LOVE THEM. :) They really pull the whole kitchen together. I mean, my word....look how good they make my coffee and eggs look?

  • Doors - Here's another quandary. Our pantry doors and the surrounding frame were originally painted the color of pooh. That's really the best descriptor I have. We had been hoping to change them for the last five and a half years, but never got around to it. I searched the depths of Pinterest to see what we should do. I really didn't want two white doors in the middle of a long kitchen wall; they would just be asking for dirty little handprints every day, I know it. I decided to go with black, and a metallic glaze. Here's a word to the wise. If you ever care to glaze something, read up on glazing first. My nephew (who is an AMAZING painter and helped us SO much with this kitchen) and I glazed them with a metallic finish; after they dried, I added more black back in because they looked a little splotchy. I think they are just right now.

    In addition to the color, the dated brass doorknobs had to go. I couldn't find any respectable stainless looking dummy doorknobs, so I painted them with Rustoleum spray paint. Wahoo. They are a little on the sparkly side (because of the color I picked), but I think they work well and it wasn't a bad process. (Thank you for the idea, Pinterest!)


  • On the other side, in an effort to balance the room out with complementary colors all around, I added black curtains tied off with a little rope for detail (Target - 2 panels for $24.99). Rope was on a spool from the fabric store. Aside from the black curtains, the door still needed some balancing. I made this black and natural burlap wreath with a black bow to tie it all together. 


On a sad note, the motor died on the Kitchen Aid mixer we got for a wedding gift almost 10 years ago. :( THANKFULLY, I was given a brand new sparkly beautiful one for Christmas. How about that? It even matches the kitchen. :) We got a MUCH NEEDED new knife set, too. 


So, I think that's it (for now!). We'll eventually replace the large flourescent light that hangs where our island once was with recessed lighting. But, for now, we have a bathroom to fix-up and we're just happy to have a working kitchen! :) 


Tuesday, December 10, 2013

DIY Anthropologie Letters

As I mentioned in my last post, we're in the midst of a kitchen re-do; while plenty of things still wait to be done (cabinetry hardware, countertop installation, doors and trim painted, junk sorted), I could not seem to rest until that one blank space on our wall, which formerly housed a DIY chalkboard (that I accidentally trashed with paint markers) was filled. Blank walls make me nervous. Know what I mean?

I hit up TJ Maxx and, after having three children there for two hours, we came up with nada for the wall. I searched Etsy for some incredible handcrafted masterpiece aaaaaaand, nothing. Nothing in my cheapskate price range anyway. FINALLY, I remembered the oversized wall-letters I pinned some time ago. I started wondering if I could pull this project off or if it would result in an oversized mess in our kitchen... My curiosity won and we headed to the craft store, with only two littles in-tow this time.

I know you all have seen these. I know some of your are probably wondering if this super-easy craft is blog-worthy. However, I must tell you, I am a reformed non-crafter. All this crafting business is still new to me. I don't even own a glue gun yet. GASP! I'm amazed at how inexpensive and simple this was and, of course, that it actually worked without me gluing my fingers together, spilling a gallon of paint on the new floor, or catching something on fire. I'm just being honest.

Here it is.

See these? $98 for one letter? We won't be needing them.


Two of the littles and I went to Jo Ann Fabrics and picked up one of these. With a coupon, I think it was about $5. It's made of paper mache and surprisingly well-constructed.


I had some paint on hand, Martha Stewart's black metallic and then I picked up another straight metallic from Martha's collection, also from Jo Ann's.

I used a foam brush that I already had on-hand, though I'm sure you could use a regular paint brush as well. Foam brushes are nearly a dime a dozen and deposit nicely in the nearest trash receptacle when you're finished with them. I'm all about minimal craft clean-up, folks.

I painted on a nice coat of black, then did some touch ups. After that coat dried completely (or most of the way, anyway), I moved on to a coat of metallic. You can add as little or as much as you want, depending on the look you desire. I wanted this letter to look more black than metallic. So, I think that's how it ended up.


I attached velcro to the back (also picked up at JoAnn's). Look for it by the 3M hooks.


Then, I sat back and took a sigh of relief for a craft well-done, with a DIY peppermint mocha. Yum, yum, yum.


Wednesday, December 4, 2013

First world problems, indeed.

I don't know if it's possible to lose touch with reality while simultaneously grasping reality with all your might; no less, I think that's what just happened here. Three weeks ago, about mid-week, my hubs says something to the effect of, "Oh, hey, the kitchen floor is getting ripped up on Monday." 

Oh, really? 

We've been talking about replacing our shabby torn-up linoleum for five years now, but with many littles underfoot, the time was never right for such an undertaking. The only way we ever got hardwood flooring through out our first level was because the crew (of folks we know) came and laid it while we were on vacation. Because we've been talking about it for SO LONG, I've pinned about a dozen different kitchen ideas and thought I had it all figured out, until he said GO (to Home Depot and sort it all out, for realz). Like really real. Like go get the stuff and bring it home because we're doing this real.

I started panicking. Anyone who has so much as replaced a doorknob knows that one home improvement project leads to another. We started with flooring; however, flooring goes under the cabinets. So, we might as well paint the cabinets, right? As long as we're messing with those, how about new countertops. Ok! We might as well paint the walls while the cabinets are out; oh, and, don't you know that lighting is looking dated, too. Back to Home Depot, for the 27th time this week.

I thought my plans would come together once we had tile picked out. Then, out of desperation, I asked Facebook what color our cabinets should be - white or espresso - because I truly couldn't decide. While my innate desire to have this ornate Tuscan kitchen really wanted the espresso cabinets, my fear of having a too-dark seedy watering hole-eqsqe room attached to my family room made me think otherwise. I probably made 47 phone calls to my sister-in-law about this, who now answers my calls with "Yes?" and an eye roll, I'm certain. I bought the espresso paint.

Then I started freaking out. I found myself Googling and Pinning cabinet colors in the middle of the night because I couldn't sleep over this ridiculous non life-altering decision. I was also tossing and turning because our laundry was down with the floor job and I wasn't sure what the kids were wearing to school the next day or what restaurants we'd be hitting up for our wholesome eat-out-for-every-meal-because-the-kitchen-is-closed lifestyle. Then I realized... I am being ridiculous.

There are so many heartaches in this world - poverty, crime, abuse, addiction. So many BIG issues. And, the color of the cabinets and my kids freshly laundered clothes aren't among those issues. They are in no way worth losing sleep over. In fact, my obsession with these non-issues was taking my heart away from the really important things in life. As I was getting cranky and unlovable feeling a bit frustrated because our house was seemingly upside down for a week, I started realizing that I needed an attitude adjustment and to stop and realized how blessed we are. Truly blessed to be take that next breath; to be able to feed our kids; to do our laundry in the convenience of our home; to have clean water and warm beds to sleep in and a safe place to call home. AND, most importantly, whenever we focus too much on ourselves; our dwelling places; our junk; our toys...we lose sight of what's really important, and that's Jesus.

And then, I returned the espresso paint. I saw the right color sitting in the mis-tint pile for half-off and took it as a sign.

God is good, people. And, sometimes he provides answers where we least expect them - in the midst of a big mess or in the mis-tint aisle at Lowe's.

Friday, October 25, 2013

I've been desperate to paint our kitchen cabinets...

...for AT LEAST three years now. It hasn't happened because:

1.) We have no time.
2.) If we did have time, there's like 847 other things on the list before painting the cabinets.
3.) It's going to make a mess of our kitchen.
4.) A dysfunctional kitchen will send the kids and, consequently, I into meal-time hysterics.
5.) I might make a mess of the cabinets.
6.) I never have the right supplies and, based on the current number of children we have, I only have patience for one trip to Lowe's or Home Depot, per project.

Soooooo, here's the deal, I may be an artsy girl, but I make a big gigantic mess when it comes to paint. It's not that I can't paint, I'm just impatient. I rush the process. I spill crap. I attempt to use the wrong tools. And, I don't like cleaning it all up at the end. No less, the builder-grade kitchen cabinets we have (see first photo), have been talking to me.

Cabinets to Me: "We want a make over. We saw you get your bangs cut right here in this very kitchen. Now, update us!" 

Or, you know, something like that.

I said, "Ok, cabinets. Let me start with something easy so I don't ruin you. Deal?" 

And, with that, half the kids and I headed to Lowe's this morning. I didn't even know what color I was going to paint the cabinet. White? Grey? Black? I basically looked through paint chips until the smallest child was trying to stand up in the cart and the second smallest child was trying to let herself in the roped-off paint mixing area. Those indicators mean mama's time is UP. I decided to take a risk and make my own chalk paint - as seen on Pinterest, of course. Not chalkboard paint, chalk paint. It's this super paint that's supposed to be super versatile; require no sanding; put off a beautiful matte finish; and, just flat-out be lovely to work with. Sounds like what I needed, right?  I think it's mostly sold in little boutique-y stores and, from what I hear, it has a pretty steep price tag.

After lunch today, I started dismantling the icky cabinet in the kids bathroom. I figured that if I *really really* screwed it up, we'd just put an OUT OF ORDER sign on the bathroom door when company came over and lock the door and give the bathroom a total overhaul sooner than later. I know, I am a planner when I want to be.

I mixed up the paint, which went surprisingly well. It just took a cup and a half of paint; half a cup of water and half a cup of Plaster of Paris. Easy! To see the complete recipe I used, click here. Thankfully, the baby was an amazing napper today! She napped long enough for me to clean them up and sand them down. I sanded just for good measure; besides, there was some toothpaste cemented on a couple of the pieces. I was also able to put four coats on both the doors and cabinet box. She woke up right before the final waxing (or in my case, polyurethaning) stage. I had her older sisters go babysit (aka, throw some noise-making toys in her crib) while I finished the cabinet.

Everything went together really well aside from some touch-ups (I had some issues with peeling paint on the underside of one of the water-damaged drawers). It looks like one (or more) of the kids filled the drawer with water at some point. So, you know. There's that. That's a DIY for another day, though. I also got a decent amount of paint on the kitchen floor, but that came right up with some cleaning spray and a scotch bright. :)

We need to get some drawer pulls and knobs installed; over-all, though, I think it brightens up the bathroom and gives it a more current look. You think?

PS. Painting this cabinet wasn't nearly as scary or messy as I expected; however, the kitchen cabinets are still on the waiting list. Ain't no mama got time for that....right now, anyway.


Thursday, July 5, 2012

It's heel-acious!

I'm issuing a disclaimer up front; if you're grossed out by feet, you probably want to go read someone else's blog today and check back tomorrow because we're talking about icky, dry, cracked, heels here today.

So, I'll tell you this, I don't spend a lot any time looking at other people's feet or even my own really. I've been known to keep my summer toenail paint-job on through the winter and into the next spring. I'm not talking about a salon pedicure either; I mean a 45 second paint job done on my way out the door to somewhere where people might actually look at/judge my toes.  Something about my feet has been a little troublesome lately, though. My heels were getting super dry and cracked; I figured it was just something that came with the territory of sandal-wearing and barefoot walking in the summer and that I'd have to wait it out. It's not like I can actually reach my feet right now to moisturize them anyway.

The other day, though, it was a miserable 90-something degrees outside; my ankles were SUPER swollen and my feet were killing me; while I couldn't do much about that, I decided the dry skin was one irritation I could take probably care of. I went to Target and bought a heel sander without doing any prior Googling, of course, to see how I could best cure my rhino-skin feet (that's gross, I know). I ripped open the sander as soon as I got home and took care of that gross dry skin! My brute-force method did work, but since then I found a pretty sweet tutorial online that I think I'm going to try next time. Check it out here! Turns out I'm not the only one with icky summer feet!

So, people, I'm so happy about my soft(er) feet that it almost makes me want to paint my toenails more than once a summer!! If you have a case of sandal-foot, check out the tutorial. You'll be glad you did. :)

Monday, June 18, 2012

A haircut, followed by a spiritual lesson.

Okay. So, previously, I posted about cutting my own hair. I cut several inches off a month or so ago and it turned out well. Then, on Friday night, I got a little overly-confident with my new skill. I decided to cut some more off. Somewhere halfway through the process, I knew I was losing it (random chunks of hair, that is). I knew what was going to happen when I looked in the mirror. When I made the last snip, I let my hair down in looked in the mirror. "okay, okay, not that bad...the front is two inches longer than the back and that's fixable," I thought to myself. I went ahead and snipped the front to match the back. The problem was...I wasn't really equipped to make that fix on my own; I made some crazy maneuver that left the front about an inch and a half shorter than the back. It was starting to look like something from SNL. There, in my bathroom, at 10:30pm or so, I proceded to style my hair (cover my mess-up) in an effort to convince myself that it wasn't that bad. Once I was okay with it, I went to bed.

The next morning. 

I woke up with hair that very closely resembled my two-year-old's bedhead and uneven locks (not nearly as cute, of course). I looked at it, curled it, and immediately called my stylist friend (the one that I said may have to eventually come and save me). I explained my predicament. She responded with, "just call me when you need a haircut" and came right over to rescue my tortured locks.

The result? 

My hair is really short. It looks good because my stylist friend is super talented; she could put a lampshade on my head and make it look like the latest trend in hair artistry. However, it is shorter than I'm used to (which is totally my fault, btw, for getting scissor-happy).

So, what now? 

I learn a spiritual lesson of sorts. I'm not saying that haircutting is a spiritual lesson in itself, but it made me think about all of the times we (as Christians) try to fix things ourselves instead of calling out for help. I could rattle many, many accounts in my own life when I tried to be the solution instead of seeking God; We try to do things ourselves. We realize we're not doing the right thing, yet we do it anyway. When things don't work, we try to patch it all up ourselves. When that doesn't work, we (hopefully) call to Jesus for a fix. He may not fix it in the way we hoped (like how my stylist couldn't add 4 inches back to my hair) or as quickly as we'd hope, but everything is for His glory and is perfectly orchestrated by Him. 

Like my hair stylist friend who said, "Just call me when you need a haircut." Christ also commands that we call on Him. 
Jeremiah 29:13 says, "You will seek me and find me when you seek me with all your heart." 

Speaking of issues more significant than my crooked hair,
 I have tried to be the solution. I have tried to solve a problem that was deeply rooted and obviously only fit for God to deal with. I've been refined and groomed by Christ, fixing me however he wishes.

Seek the professional problem-solver, call on Christ.


---

Grace Laced MondaysThis post is linked up to Grace Laced MondaysBetter Mom Mondays and Just for Fun Fridays
Hop on over to to those awesome sites to see who else is sharing.

Tuesday, May 15, 2012

Newsflash: Thanks to an 80's movie, YouTube and too few hours in the day, I cut my own hair.


I had a Molly Ringwald moment on Friday night. Remember the 80's flick, For Keeps (yes you do), where a pregnant Darcy Elliot Bobrucz (Ringwald) goes into the bathroom and chops off her own hair? I SO did that! I always remember seeing that scene thinking, "I wonder how she knew what she was doing?" Of course, I'm sure some Hollywood stylists whisked her off to a salon when the cameras weren't rolling, but still.

I didn't really cut it in a fit of hormonal rage or anything, it had just been a while since I had a haircut - like 5mos a while - and I couldn't seem to find the hour to go get it done. This is coming from someone who used to get her hair cut, colored and brows waxed every 4-6wks. Now, my stylist is a friend of mine and she's the only one who's touched my hair for about four years. I knew that if I really screwed my mop up that I could take it to her, plead temporary insanity, and she'd get it all fixed up for me. In an effort to save time, though, I started YouTubing yesterday afternoon. I was surprised to find A LOT of tutorials on cutting one's own hair. I started with the basic "how to cut your own hair" search and, then, considering my super-thick wavy hair I started searching on how to cut layers and thin out hair. I know.

After the kids were sound asleep, I started chopping and thinning. I probably cut three inches off the main part of my hair and five off my bangs. Surprisingly, it turned out fine! Does it look like my super awesome stylist did it? 
No. Does it look like someone cut it blind-folded? I don't think so, but that's the beauty of not being able to see the back of it. My husband liked it, which is a good sign. And, no, he wasn't just being nice because I'm pregnant and we all know frowning on a pregnant woman's appearance in any way is like spitting on a fire-breathing dragon. He had to trim one little piece I missed in the back; but, other than that, and the insurmountable amount of hair that this experiment left ALL OVER THE BATHROOM FLOOR AND SINK AND BATHTUB (I don't think they don't show that part in For Keeps), I think it was a success! 

I also feel somewhat liberated. This is one more little thing I can do that saves my family time and money...until I have a little slip of the scissors and have to seek corrective action from my stylist friend that is. Hopefully I won't have to write that post any time soon, though. PS. I've been waxing my eyebrows for about a year, too, but that didn't start out as well and that's for another post. :)


PPS. This post is linked up with Titus 2sday over at Time-Warp Wife's place! Click here to hop on over and check out the other super awesome link-ups featured today.

PPPS. If you are inspired to cut your hair upon the basis of this post or your findings on YouTube.com, I'm totally not responsible for the outcome. That's why I left no tutorial here. :)